
Every homelab has a weak point.
It’s usually not the network.
It’s not the CPU.
It’s not even the power setup.
It’s the old hard drive.
The one that came out of a retired DStv Explora.
The one that’s been spinning for years without complaint.
The one SMART says is “fine”.
Until one day, it isn’t.
And when that drive finally gives up, the question won’t be why did this fail?
It’ll be why didn’t I back this up properly?
This is the story Zerobyte is built for.
The Homelab Backup Problem
Homelabs tend to evolve organically.
A directory here.
A share there.
A NAS that started small and quietly grew important.
Backups usually lag behind.
They’re often:
- a shell script written once and never revisited
- a cron job nobody remembers configuring
- a copy to another disk in the same machine
Worse, many backups appear to work… until the day you actually need them.
Zerobyte exists to remove that uncertainty.
Not by reinventing backups, but by making good backup practices boring, visible, and reliable.
What Zerobyte Actually Is
Zerobyte is a backup automation tool built on top of Restic.
That’s an intentional choice.
Restic already solves the hard problems correctly:
- strong encryption
- deduplication
- compression
- snapshot verification
Zerobyte doesn’t replace Restic.
It orchestrates it.
You get:
- a modern web interface
- scheduling and retention policies
- support for local and remote volumes
- clear visibility into what’s running, and what failed
In short: Zerobyte turns “I should really set up backups” into “this is already handled”.
Installing Zerobyte in a Homelab
Zerobyte runs as a Docker container, which fits naturally into most homelabs.
A minimal setup looks like this:
Generate a secret once:
openssl rand -hex 32
Create your compose file:
services:
  zerobyte:
    image: ghcr.io/nicotsx/zerobyte:v0.25
    container_name: zerobyte
    restart: unless-stopped
    cap_add:
      - SYS_ADMIN
    ports:
      - "4096:4096"
    devices:
      - /dev/fuse:/dev/fuse
    environment:
      - TZ=Africa/Johannesburg
      - BASE_URL=http://localhost:4096
      - APP_SECRET=XXX # Paste your generated secret here
    volumes:
      - /etc/localtime:/etc/localtime:ro
      - /var/lib/zerobyte:/var/lib/zerobyte
Start the container:
docker compose up -d
Then open:
http://<your-server-ip>:4096
This is where theory turns into something real.
First Things First: What Are We Backing Up?
In Zerobyte, Volumes represent data sources.
A volume can be:
- a local directory
- an NFS or SMB share
- a WebDAV or SFTP mount
For a homelab, a common first step is protecting a local directory, maybe that old drive full of configs, photos, media, or irreplaceable “random stuff” (immich).
Mount it into the container:
volumes:
  - /path/to/immich:/immich
Restart Zerobyte.
In the web UI:
- Go to Volumes
- Click Create volume
- Choose Directory
- Select
/immich - Give it a clear name
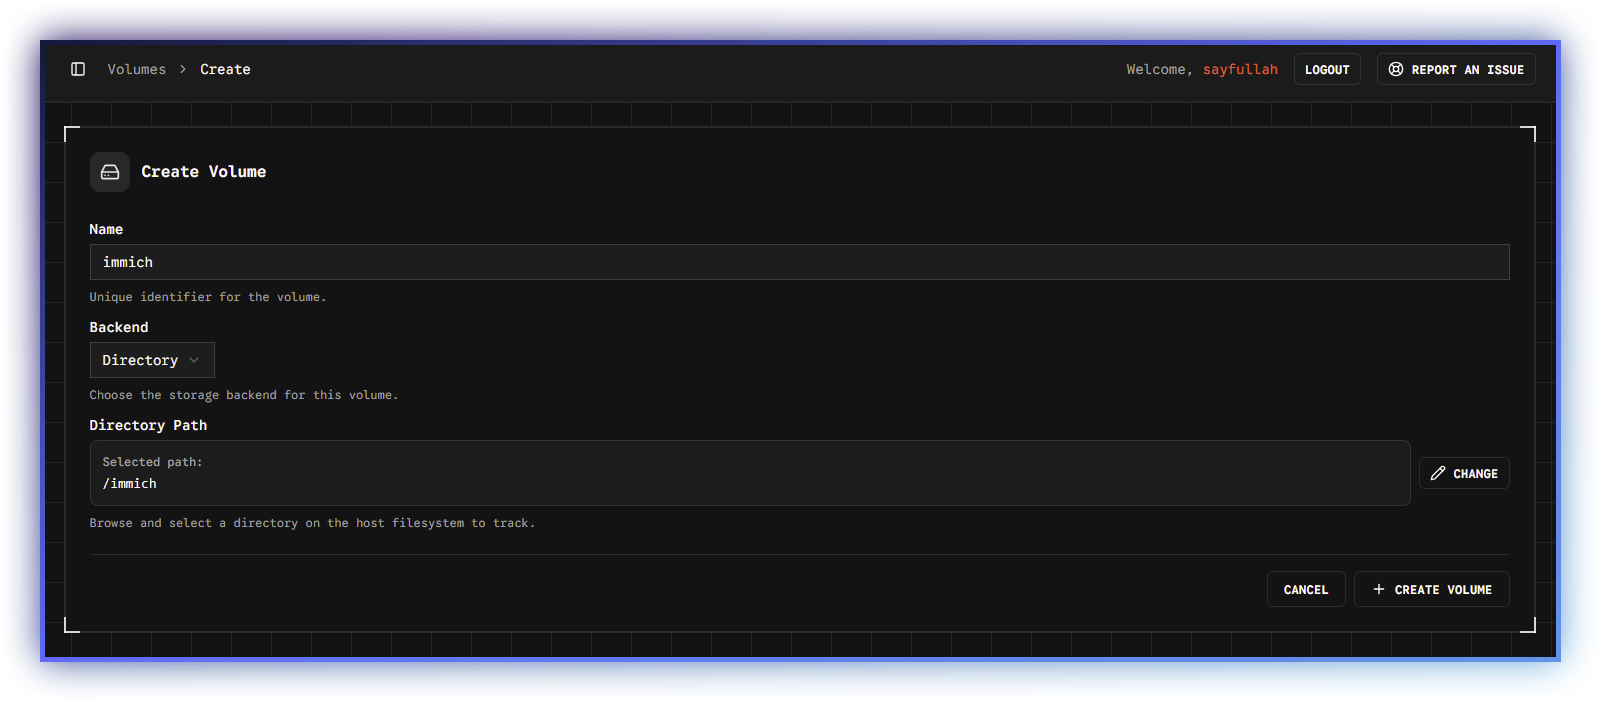
Zerobyte now knows what to protect.
The next question is more important.
The Offsite Question
Backing up to another disk in the same machine feels comforting.
But homelab reality says otherwise:
- power surges don’t care about RAID
- theft doesn’t respect mount points
- fire doesn’t differentiate between “primary” and “backup”
A real backup needs to be offsite.
Cloud storage solves that, but introduces another concern: egress costs.
The worst time to discover pricing surprises is during a restore.
So the goal becomes simple:
Cheap storage, predictable restore costs, and no vendor lock-in.
This is where Backblaze B2 enters the story.
Why Backblaze B2 Makes Sense for Homelabs
Backblaze B2 isn’t designed for high-traffic applications or constant reads.
It’s designed for storage.
For backups, that’s exactly what you want.
- Storage costs are low (around ~R10 per 100 GB per month)
- Uploads are free
- Downloads are free up to three times your average monthly stored data
- After that, egress costs are simple and inexpensive
That pricing model matches how backups actually behave:
- frequent uploads
- rare restores
- no surprises when things go wrong
But there’s another reason B2 fits homelabs especially well.
rclone.
Why rclone Is the Right Abstraction
If you run a homelab, there’s a good chance you already trust rclone.
It:
- supports dozens of cloud providers
- keeps credentials out of applications
- makes switching providers painless
- works well with automation
Zerobyte integrates directly with rclone, which means:
- Backblaze B2 is just one remote
- your backup strategy isn’t tied to a single vendor
- credentials never need to live inside the UI
Today it’s Backblaze B2.
Tomorrow it could be something else.
Your backups don’t need to care.
Setting Up Backblaze B2 with rclone
First, install rclone on the host:
curl https://rclone.org/install.sh | sudo bash
Configure it (see here for the official guide):
rclone config
Create a new remote:
- Choose Backblaze B2
- Enter your account ID and application key
- Name the remote something obvious, like
b2-backups
Verify it exists:
rclone listremotes
At this point, rclone fully owns the cloud connection.
Zerobyte doesn’t need credentials, just access.
Making rclone Available to Zerobyte
Mount the rclone config into the container:
volumes:
  - ~/.config/rclone:/root/.config/rclone:ro
Restart Zerobyte:
docker compose down
docker compose up -d
Zerobyte can now see every rclone remote you’ve configured.
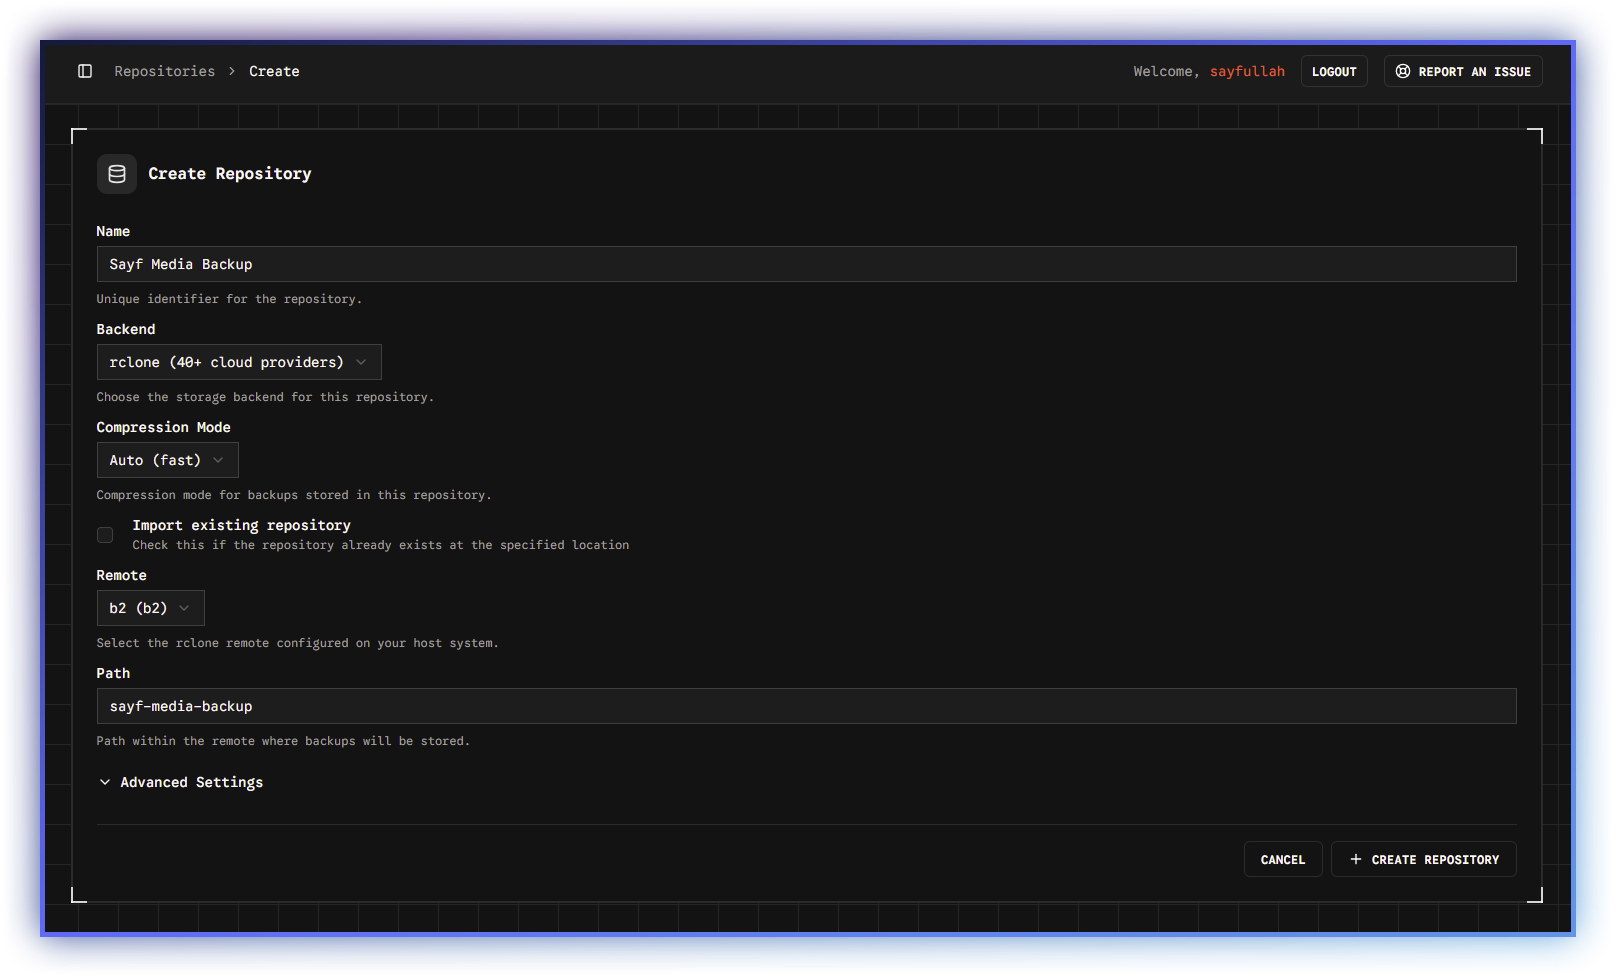
Creating the Repository (rclone + Backblaze B2)
In the Zerobyte UI:
- Go to Repositories
- Click Create repository
- Select rclone
- Choose your Backblaze B2 remote
- Pick a path (e.g.
sayf-media-backup), this will be the bucket name created in B2
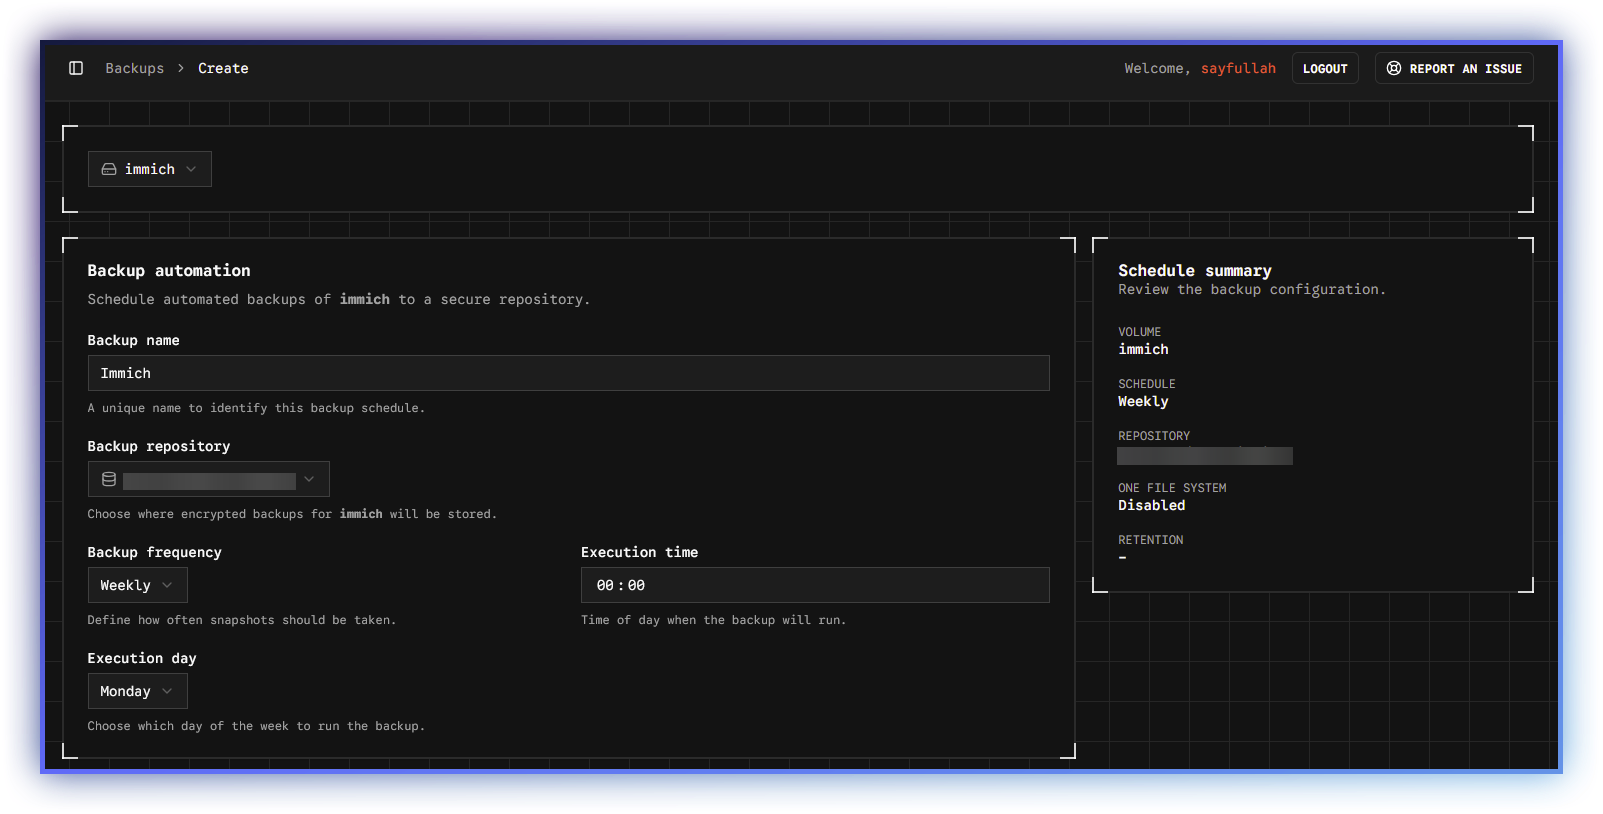
Creating the Backup Job
Now everything connects.
A backup job defines:
- which volume to back up
- which repository to store it in
- when it runs
- how long backups are kept
In the UI:
- Go to Backups
- Click Create backup
- Select your volume
- Select your Backblaze B2 repository
- Choose a schedule (daily works well)
- Set retention rules (e.g. 7 daily, 4 weekly, monthly)
Save.
From this moment on, Zerobyte takes over.
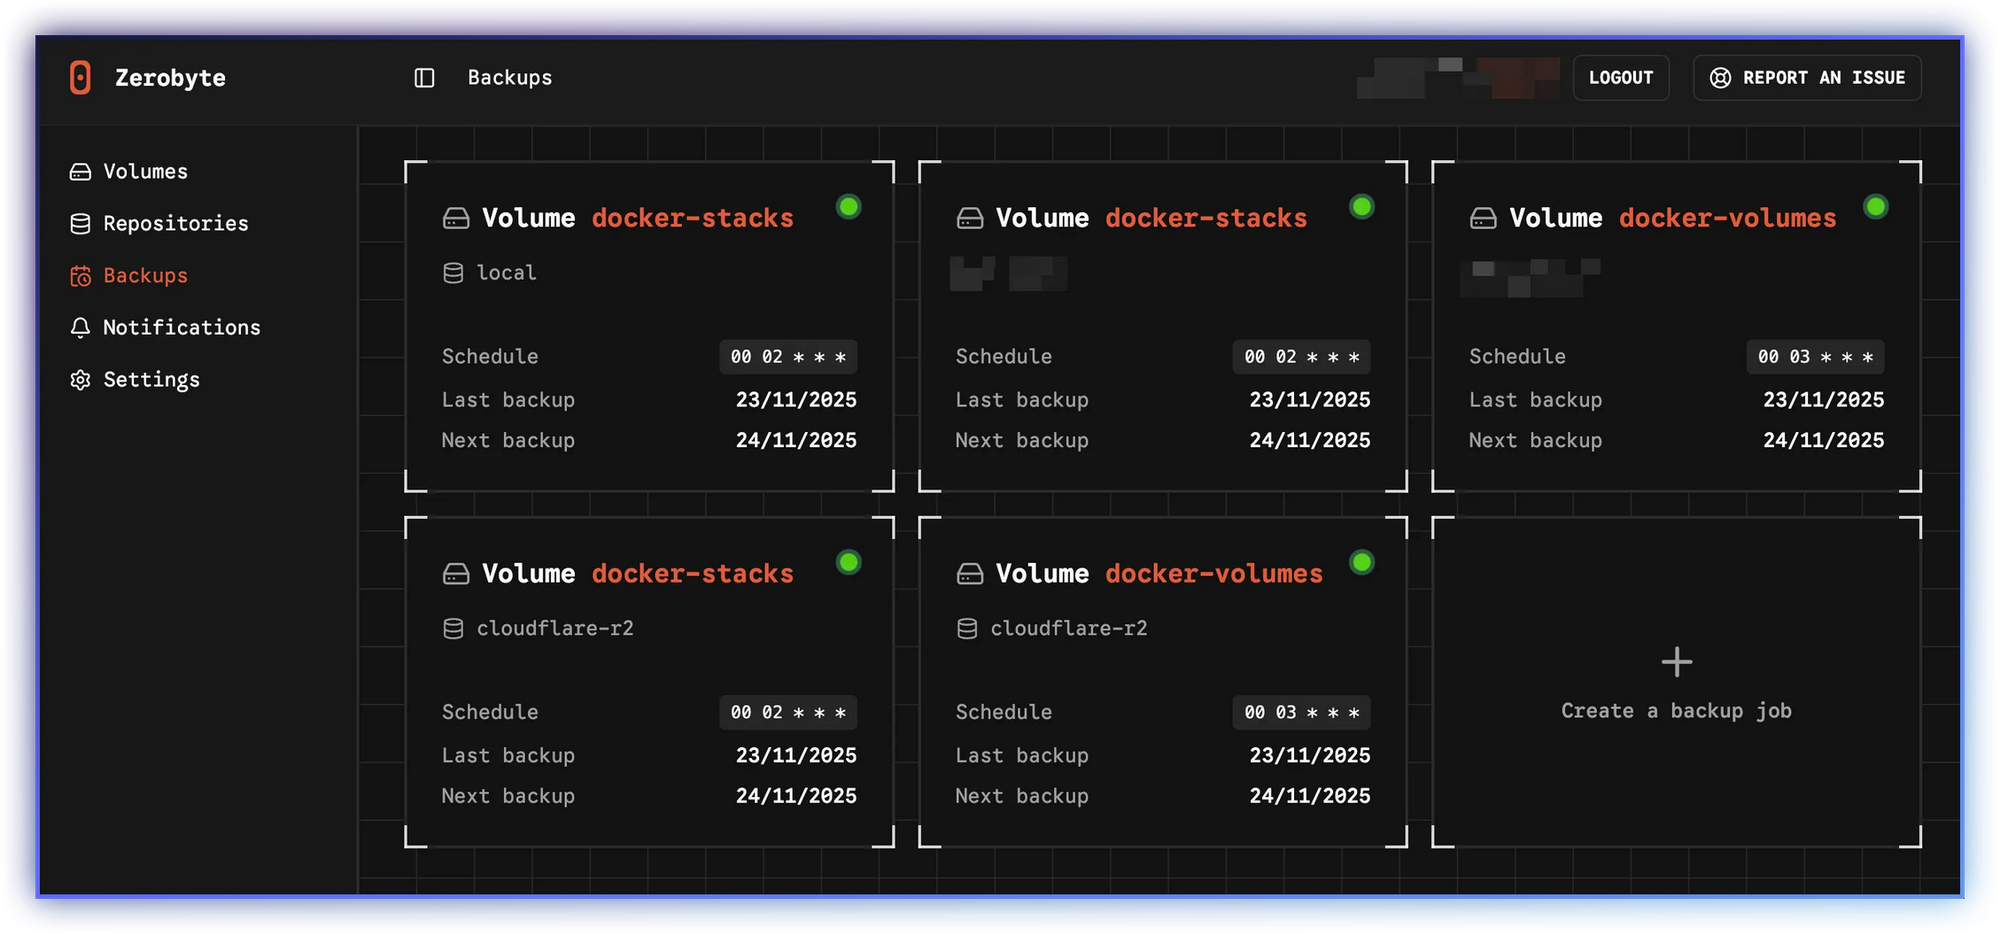
Visibility Matters More Than Automation
Automation is useless if it fails silently.
Zerobyte gives you:
- clear backup history
- job status at a glance
- logs when something breaks
- repository health information
You don’t have to hope your backups ran.
You can see that they did.
And when everything works?
Zerobyte stays quiet, exactly where backups belong.
The Day Something Goes Wrong
Eventually, something will.
A file gets deleted.
A directory is overwritten.
A drive refuses to mount.
That’s when Zerobyte stops being “nice to have”.
From Backups:
- Select a job
- Choose a snapshot
- Browse files
- Restore exactly what you need
No panic restores.
No full rollbacks.
Just a quiet recovery.
Closing Thoughts
Zerobyte doesn’t pretend hardware won’t fail.
It assumes it will.
And it quietly prepares you for that day, using:
- Restic for correctness
- rclone for flexibility
- Backblaze B2 for affordable offsite storage
- and a UI that makes everything visible
If your homelab runs on aging hardware, repurposed drives, or “temporary” setups that became permanent, Zerobyte turns backup anxiety into something far more valuable:
Confidence